Quickstart
This guide will get you started with your first simulated flight of SteelEagle in under 5 minutes!
Installation
First, clone the SteelEagle repository:
- HTTPS
- SSH
git clone https://github.com/cmusatyalab/steeleagle.git
git clone git@github.com:cmusatyalab/steeleagle.git
Then, download UV from Astral's website. UV is a Python package management tool that wraps over pip. It makes it easy to download required dependencies within a virtual environment with minimal setup.
- MacOS and Linux
- Windows
curl -LsSf https://astral.sh/uv/install.sh | sh
powershell -ExecutionPolicy ByPass -c "irm https://astral.sh/uv/install.ps1 | iex"
If on Mac or Linux, be sure to run the commands listed in the install output to source UV into your system path.
Setup
To run SteelEagle, you must have a backend and at least one vehicle set up. For this guide, we will create a simulated vehicle and spin up a backend containing an obstacle avoidance and object detection engine
Backend Setup
SteelEagle provides a backend setup wizard to streamline the backend setup process. Most backend components have published Docker image that are built using Github actions when the Github repository is updated. The Docker compose file in the backend folder is used to manage the container instances and the network between them.
Prerequisites
First, install NVIDIA CUDA/drivers and the NVIDIA Container toolkit. These are required for the cognitive engines to leverage the GPU.
Then install Docker and Docker Compose:
# 1. download the script
curl -fsSL https://get.docker.com -o install-docker.sh
# 2. verify the script's content
cat install-docker.sh
# 3. run the script with --dry-run to verify the steps it executes
sh install-docker.sh --dry-run
# 4. run the script either as root, or using sudo to perform the installation.
sudo sh install-docker.sh
Environment Setup
The backend code for SteelEagle lives in the backend directory. Under backend/server there is a setup_wizard.py script which will configure the environment
backend
└── server
    ├── docker-compose.yml
    └── engines
 ...
    ├── setup_wizard.py
To launch the setup wizard, use uv, which will create a virtual environment for all the dependencies, install them, and run the script. Use the following command:
uv run setup_wizard.py
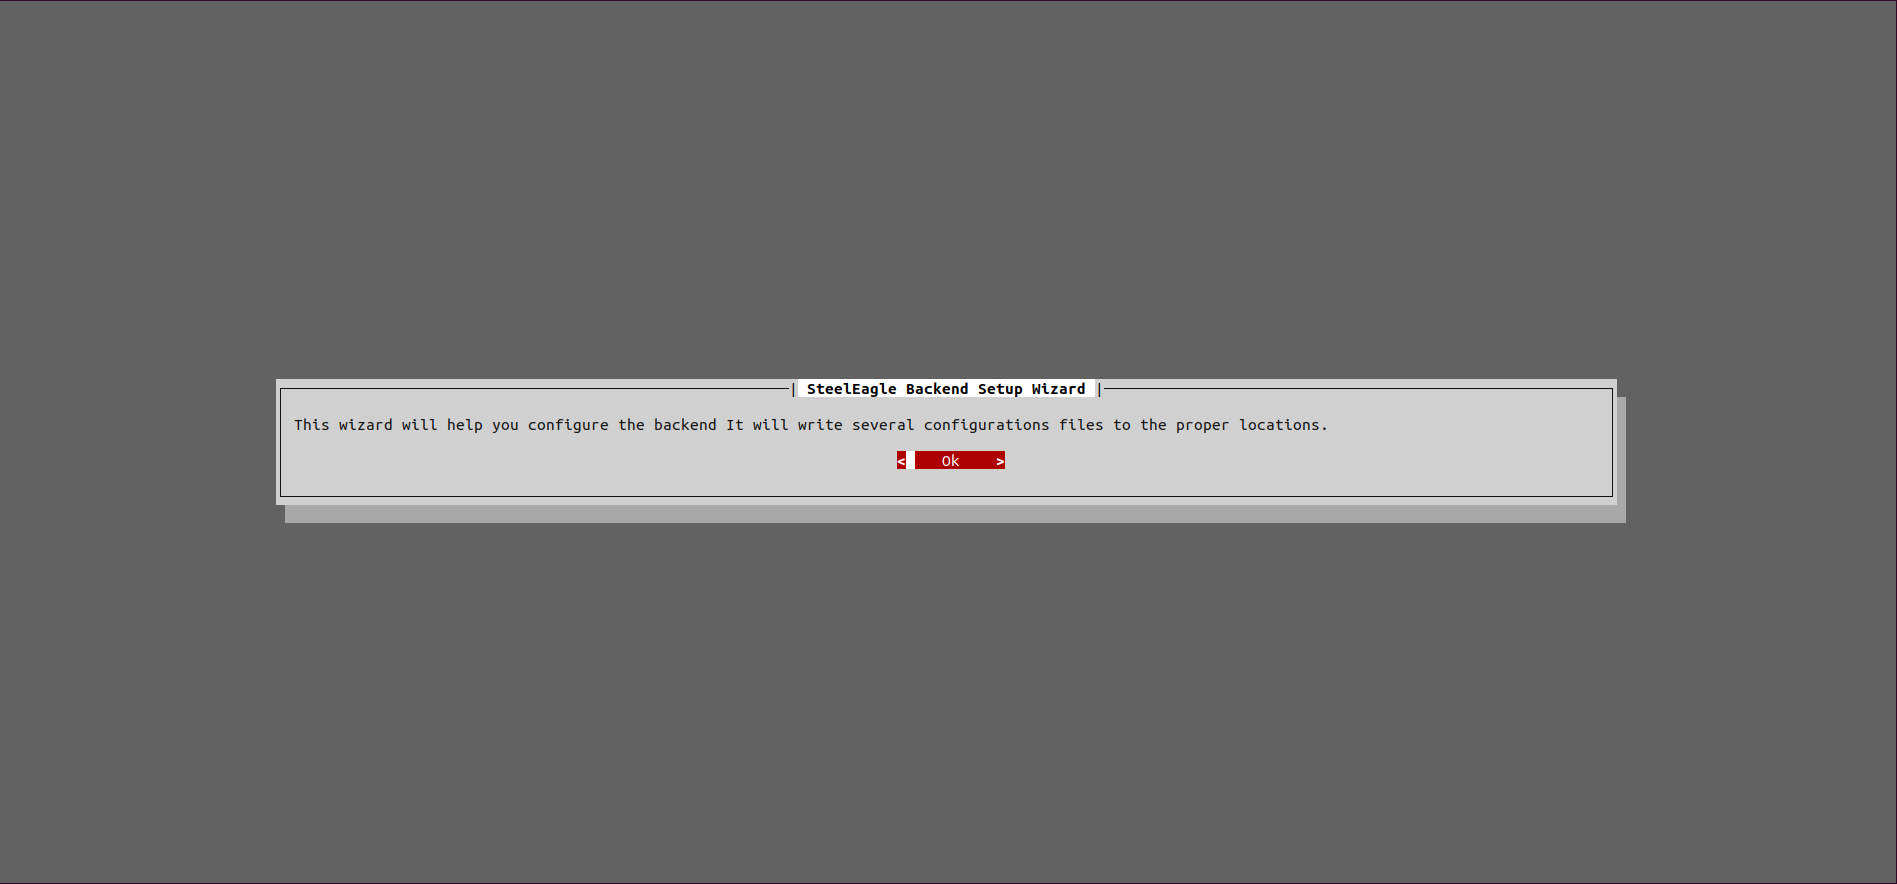
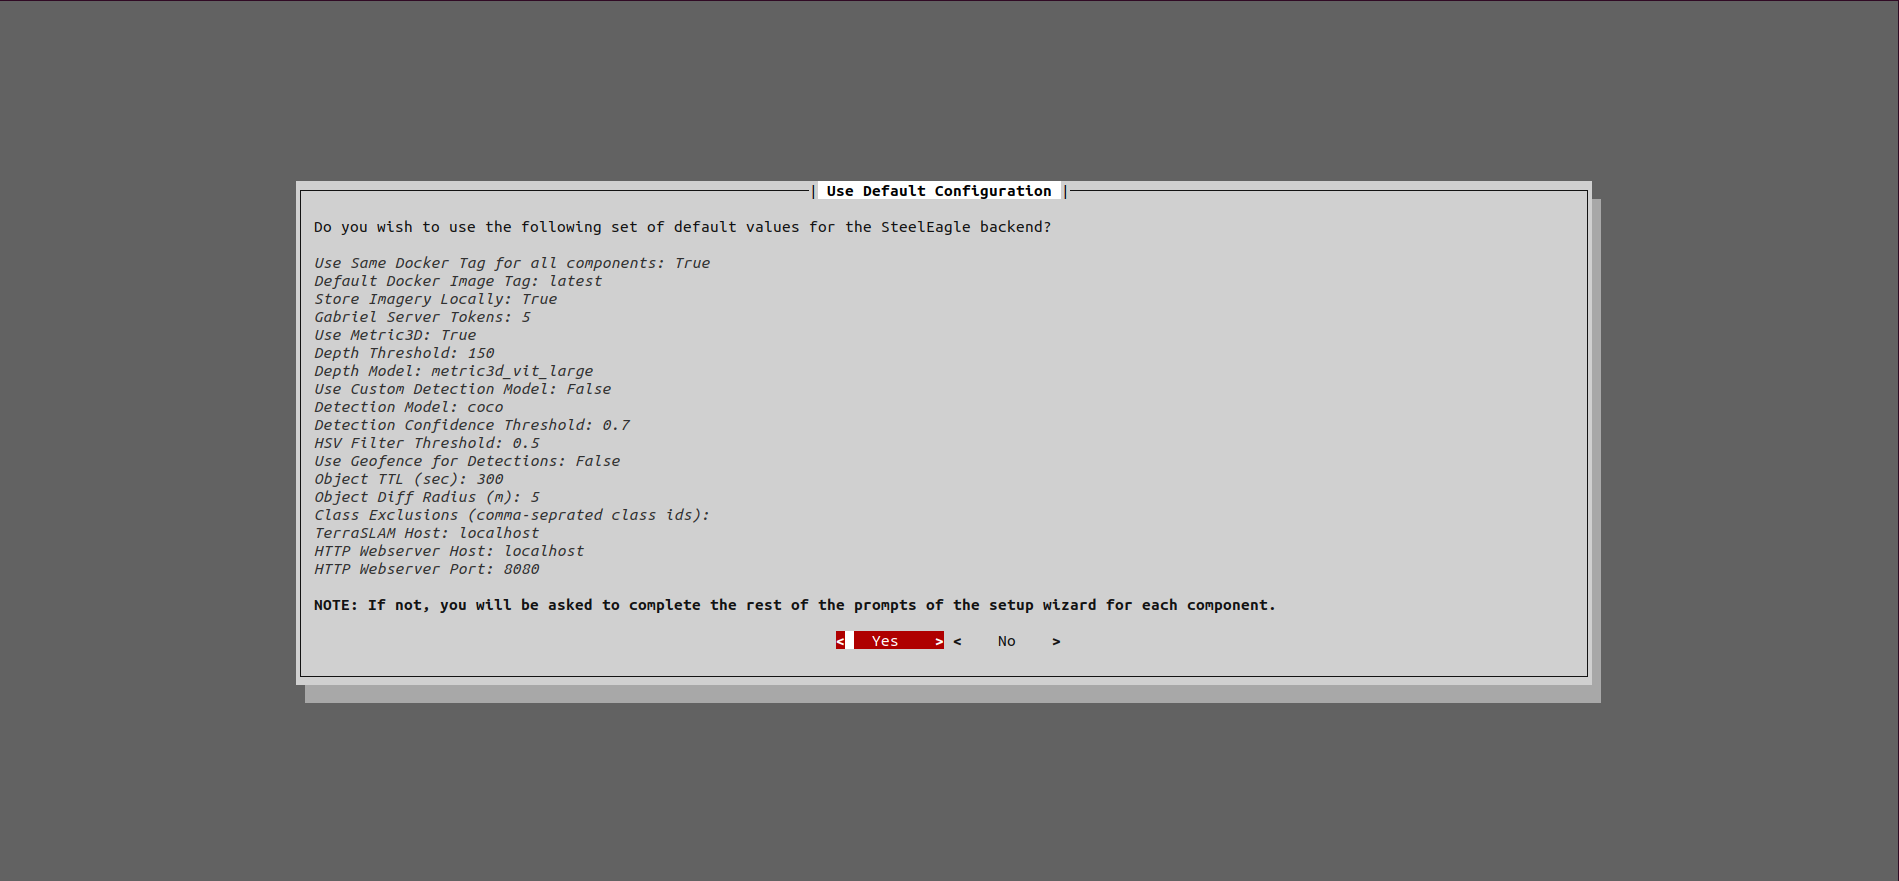
The wizard will first ask if the default configuration should be used. The default values will be displayed in the dialog box. If the defaults are used, no other prompts will be shown and the configuration files will be written. If not, the wizard will walk through configuration for rest of the components.
Once the wizard is complete, several configuration files will be written:
backend/server/.env- This file contains the majority of the variables for each of the containers in the docker-compose.yml filebackend/server/redis/redis.conf- configuration for the redis dbgcs/react/prime/src/config.js- GCS Frontend configurationgcs/react/backend/config.toml- GCS FastAPI backend configuration
If the default values are used, the setup wizard will download a YOLOv5m COCO model for use by the detection engine. If you want to use a custom object detection model, place it in the backend/server/models directory and enter the filename when prompted during the setup wizard.
Launch with docker compose
The docker-compose.yml file is pre-configured to launch the required
backend computation engines and expose the ports needed to allow for
communication between components.
Tmux can be used to create multiple windows so it is easier to view logs while also starting/stopping components.
To launch the containers:
cd ~/steeleagle/backend/server
docker compose up -d
To stop ALL the containers:
docker compose down
To stop and individual container:
docker compose stop <container_name>
To view logs for an individual container:
docker compose logs -f <container_name>
To create a minimal backend with just the telemetry engine, Redis DB, and the swarm controller:
docker compose up telemetry-engine redis swarm-controller gabriel-server http-server
If running the minimal backend, you need to change the law file in .laws.toml, found in the vehicle/.
Change:
[__BASE__]
enter = ['Compute.AddDatasinks|{"datasinks": [{"id": "telemetry"}, {"id": "object-engine"}, {"id": "obstacle-engine"}]}']
to:
[__BASE__]
enter = ['Compute.AddDatasinks|{"datasinks": [{"id": "telemetry"}]}']
GCS Setup
The GCS is built using React/FastAPI. The install script will install nvm/npm, build the frontend application, and then use uv to install the FastAPI requirements.
cd ~/steeleagle/gcs/react/
sh -x install.sh
Once installed, the GCS can be launched using uv run:
cd ~/steeleagle/gcs/react/backend/
uv run main.py
Vehicle Setup
Navigate to the vehicle/ directory within steeleagle. Then, copy the config.template.toml file to config.toml.
This is the configuration file that the vehicle will use when running. There are four important fields you must set before running.
There are:
name: the name of the vehicle reported by telemetry; this is the name that will appear on the GCSpackage: the driver package you want to run, in this casesteeleagle-simswarm_controller: the IP address where your swarm controller is running (in most cases, this will be where the rest of your backend is); for instance,localhost:5003if it is running on the same computer as the vehicleremote_compute_service: the IP address where your compute service is running (in most cases, this will be where the rest of your backend is); for instance,localhost:9099if it is running on the same computer as the vehicle
[vehicle]
# Name of the vehicle reported through telemetry
name = 'Simulated Drone'
# Vehicle package (see https://git.cmusatyalab.org/steeleagle/roost for list of available vehicles)
package = 'steeleagle-sim'
[vehicle.kwargs]

[cloudlet]
# Location of the swarm controller (typically runs on port 5003)
swarm_controller = 'localhost:5003'
# Location of the remote Gabriel server (typically runs on port 9099)
remote_compute_service = 'localhost:9099'

[logging]
# Whether or not to create an MCAP flight log for mission replay
generate_flight_log = true
# Log to a custom filename; otherwise will autogenerate
# a name based on name, date, and time if empty string
# is provided
custom_filename = ''
# Path to log file
file_path = 'kernel/logs/'
# Log level
log_level = 'INFO'
Once done, run uv run launch.py and the vehicle should start!
Controlling the Vehicle with the GCS
First open a web browser and navigate to the GCS by entering the URL of the webserver. The GCS uses port 8002. (e.g. http://localhost:8002).
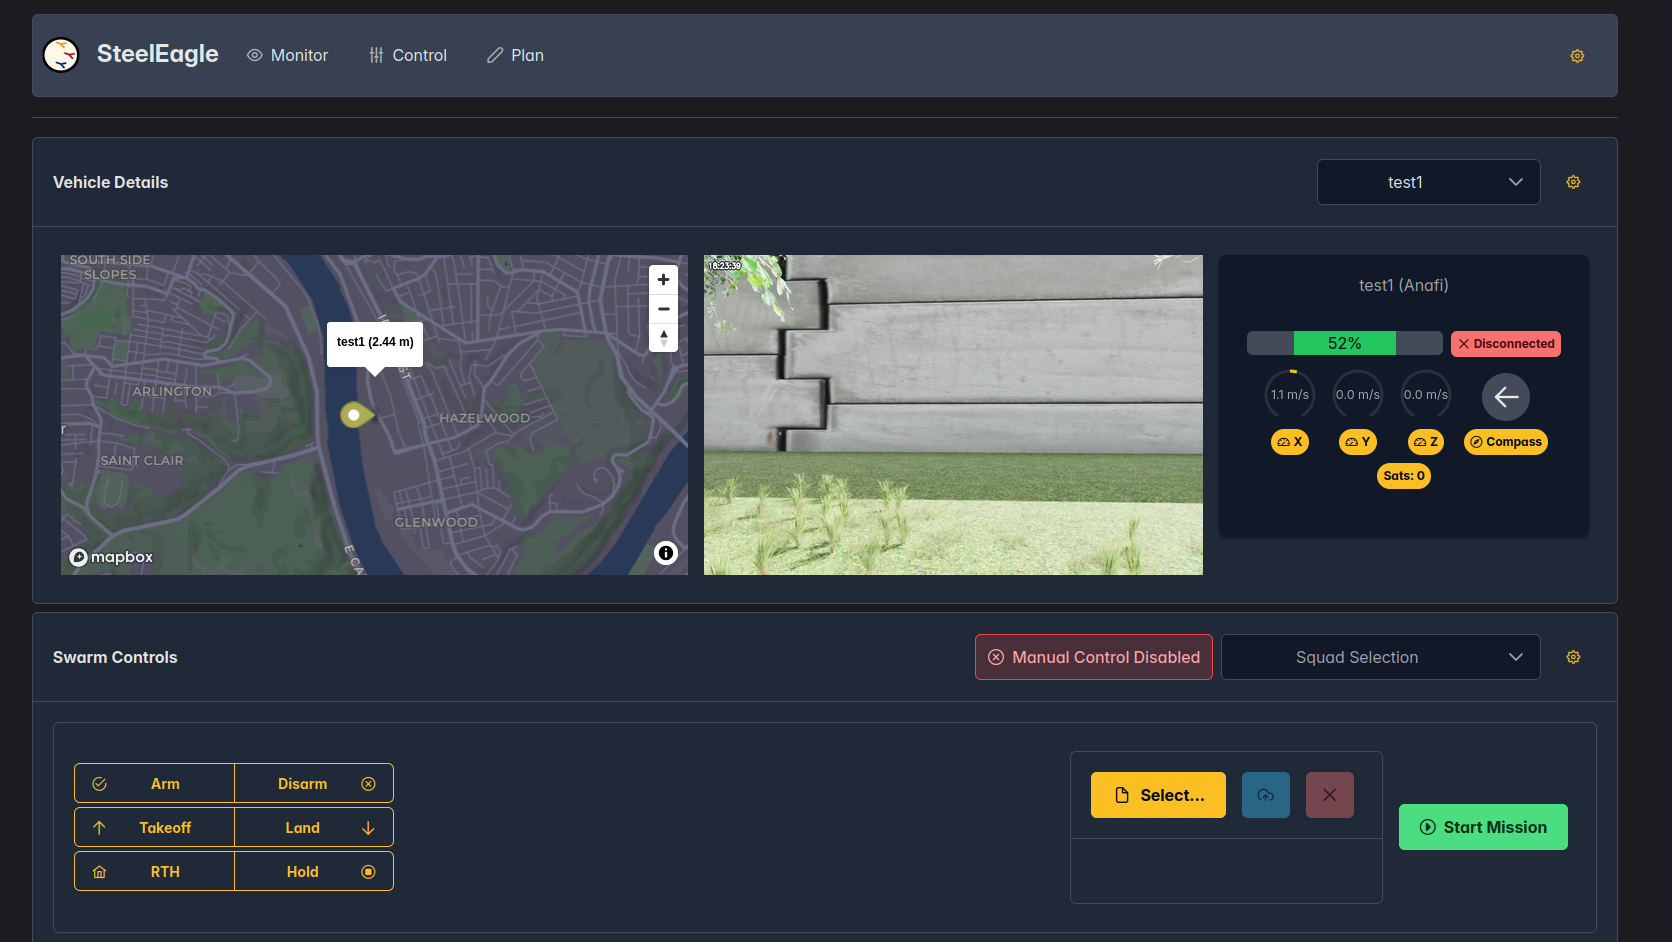
The Control tab of the GCS allows you to view the stream/telemetry of one particular vehicle, but also allows for control of multiple vehicles in a swarm using a gamepad, keyboard, or by uploading an mission to execute. The dropdown near the top bar controls which vehicle is currently viewed. The Squad Selection dropdown allows a user to select multiple vehicles for manual control or autonomous missions.
Keyboard Controls:
- T - Takeoff
- L - Land
- R/F - Pitch Gimbal Up/Down
- W/A/S/D - Planar movement
- I/K - Elevation
- J/L - Rotation
- Escape - Cancel Mission/Enable Manual Control
Gamepad Controls (PS4/PS5):
- Left Stick Up/Down - Elevation
- Left Stick Left/Right - Rotation
- Right Stick Up/Down - Pitch
- Right Stick Left/Right - Roll
- Triangle - Takeoff
- X - Land
- D-Pad Up/Down - Pitch Gimbal
- L1 - Return to Home
- Options Button - Cancel Mission/Enable Manual Control
- Share Button - Disable Manual Control
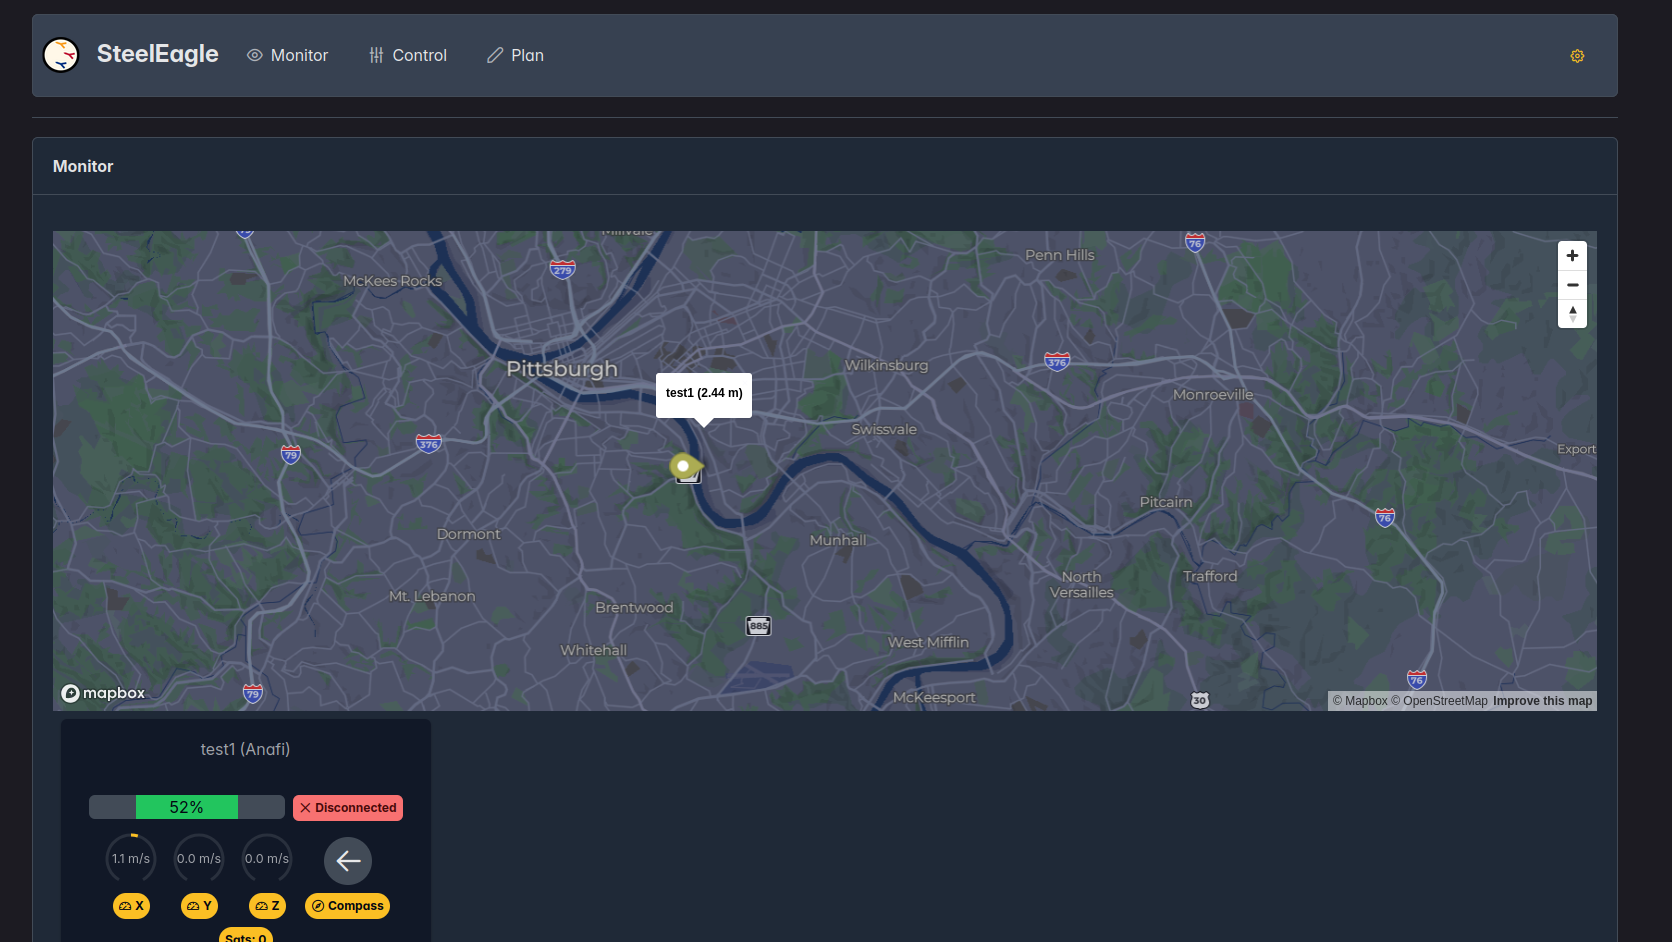
The Monitor tab presents and overview of the locations of all vehicles in a single map as well as all the telemetry for all vehicles. It will also display an detected objects on the map.
Please see the GCS Guide for more detailed information on how to use the GCS.